
Who loves a great tamale? Who doesn’t live anywhere near a decent tamale stand or Mexican grocery? Who doesn’t have the patience or team of Mexican grandmothers to make them at home twenty dozen at a time? If you answered “me” to any of these questions, have I’ve got a solution for you.
I’ve tackled tamales in another post a while back and they work a treat using parchment in place of traditional dried corn husks, the latter being scarce up here in the wilds of Canada. Of course when I got into a tamale mood the other evening I grabbed the roll of paper only to have the last two inches unravel into my hands as if the pantry was mocking me. “You want tamales? Tonight? You fool.” Never daunted when on a Mexican food binge I started experimenting with anything that could possibly hold a tamale.
This idea of making ‘creatively assembled’ tamales has been kicked around quite a lot. Not just parchment or banana leaves as different wrappers but entirely different ways to mold and form the tasty little devils. I’ve seen everything from muffin tins to full-sized tamale pie attempted. Deconstructed, resized, or inverted, many are worthy efforts but the issue I have most often with such attempts comes when they get migrated to the oven. Baking instead of traditional steaming changes the corn field too much. That’s where other interpretations switch from authentic tamale mode into ‘tamale-inspired’ cookery I say. Dry baked heat can be nice, just ask my cornbread, but for tamales I like things wet and steamy. That means any experiments have to survive an hour of steam to be considered a success.
Of course this will spawn a debate among purist that say corn husks are the only way to get ‘real’ tamale taste. I’ve tested this theory time and time again on unsuspecting subjects every time tamale night rolls around and apart from the funny husk-shaped ridges, no one can ever tell them apart in blind tastings. Perhaps in a delicate sweet tamale devoid of filling you might get faint differences in perfume but when you park highly spiced filling in proximity, any such subtlety is lost on all but the pickiest of tamal critics. And they’re not the ones standing in your kitchen hungry I’ll wager.
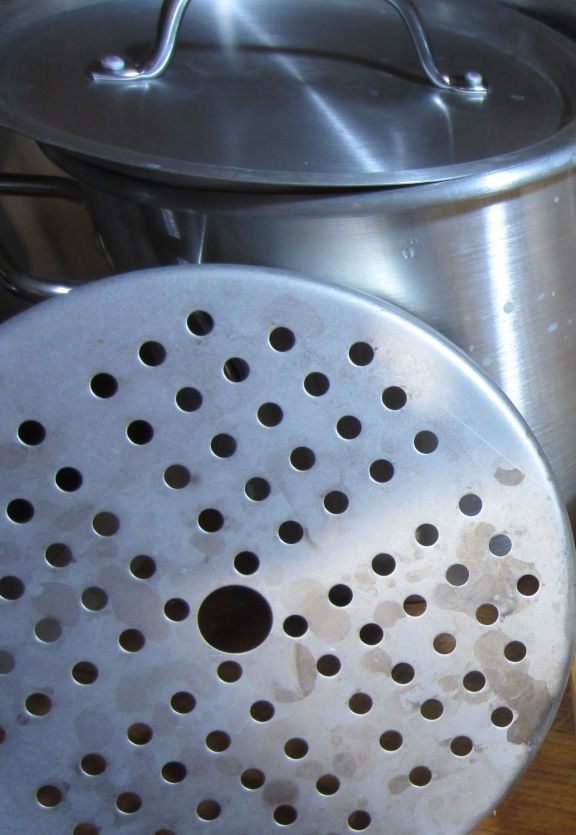
Cheap steaming pots are fabulously huge and usually come complete with lids and matching inserts. Any Mexican or Chinese grocery will have them for just a few bucks. A massive 40-litre pot shouldn’t cost you more than $15 but smaller sizes to fit your kitchen dimensions and tamale appetite can be had for a similar bargain. Not heavy or clad like ordinary stock pots, they’re meant to hold boiling water and not much else. Great when you feel like making a restaurant full of dim sum, a swarm of lobsters, or a Mexican army’s worth of tamales. Proper cookware exists in those sizes but would cost a small fortune and weigh far more than you want to lug around. I hang my set of lightweight versions on ceiling hooks out of the way until needed.
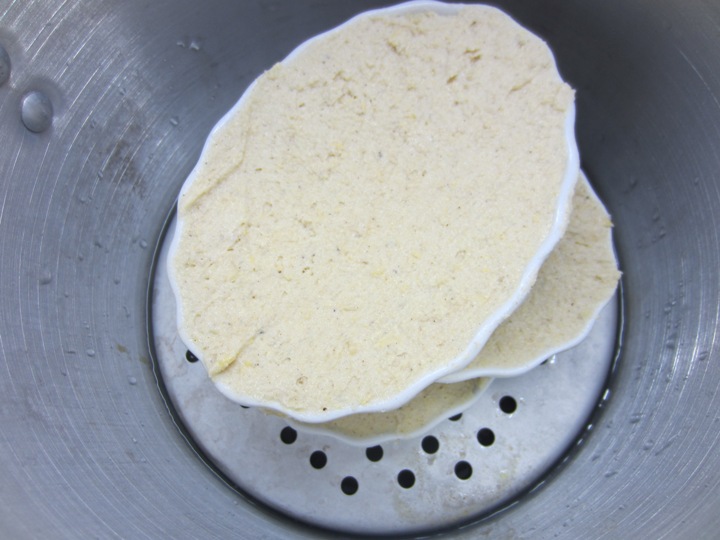
That ample real estate lets me load ramekins filled with fresh corn and masa in for a steam with the edges in stacked and staggered rows. Like delicious corn bricks or a champagne coupe stack filled with dough. I have a slew of shallow ceramics perfect for the job* but a quick check of any restaurant supply store you care to name will give you an infinite array of shapes and sizes. Mine are a mere inch deep which I found is about the thickest you want to attempt for the best ‘masa-to-everything-else-ratio’ on the fork. If ramekins you already own are taller, simply fill them less but watch out for steam drips pooling up while cooking. A quick tip of each dish midway should solve that problem should you run into soggy tamales. The dough will expand a bit during steaming so you don’t want them heaped above the rim but making them slightly concave promotes even cooking and makes playing tamale Jenga later with fillings and toppings all the easier.
* For reference I also attempted a few trials with silicone molds and was less impressed with the end result. The silicone became too flexible in steam. Muffin tins were ruled out from the start because steam doesn’t play well with metal other than stainless steel.
Get out your scale to nail down the masa to fat ratio you use to form the dough. Trust me, you want to weigh this out for the best results. Cooking will take anywhere from thirty minutes to an hour depending on your ceramics but the beautiful thing with steam is that it’s consistently predictable and fairly forgiving. Edges will firm up before centres but a sacrificial test subject can clue you in to when they’re done. It should hold shape but not be so overcooked that the edges begin to crumble when unmolded.
These need and deserve a great sauce just as with traditionally wrapped tamales. My blended chile-based taco sauce is great if you have a batch handy already in the fridge but the quick simmered stock and spice combination linked below works as nicely and can come together in seconds if you have a jar of the spice mix stirred together in the pantry. You DO have that in your pantry, right? Everyone should in case I visit for tacos unexpectedly.
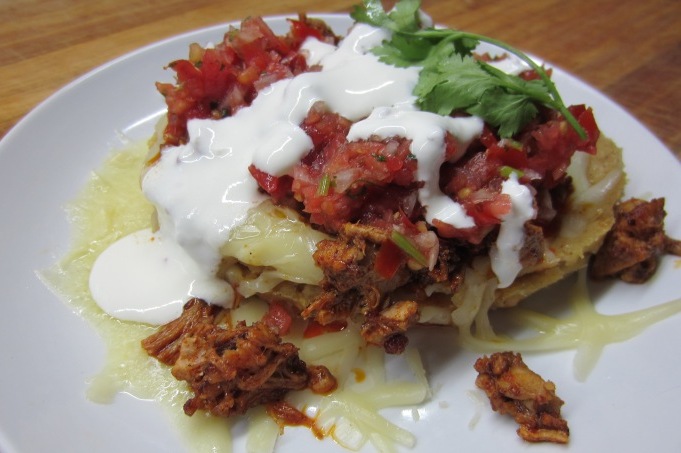
Whether you then top them with a precooked tamale “filling” like the pork cochinita pibil pictured above*, slow simmered spicy onions and mushrooms for vegetarian friends, melting queso fresco or salty crumbling cotija cheese (or both), heaps of fresh pico de gallo and diced avocado, spoonfuls of homemade crema, or some combination of them all is your choice. Stack these tamales like a fancy chef trying to impress local food critics and no one will ever know you skipped all that cumbersome husk wrapping overhead.
* My version is a bit different but I’ve yet to type up a proper post with the details. Check out this version from Rick Bayless for inspiration. Or fall back to quick and simple by browning ground beast of your choosing then slow simmering with the Tex-Mex spice, diced onions, chiles, garlic, and a bit of good stock for half an hour until the irresistible aroma makes you reach for the nearest fork.
Note: Find the vegetarian filling, quick sauce, and Tex-Mex spice mix recipes in my earlier post on tamales.
Steamed Fresh Corn & Masa Tamales
This adds seasonal fresh corn to my earlier tamale recipe with the method for using ramekins in place of wrappers. I add a bit of ordinary cornmeal for texture here because the masa available to me locally is the finer grind for tortillas instead of the slightly coarser version por tamales. Adjust according to your local supply and texture preference.
The ramekins you use should be at least one inch tall but can be taller as long as you only fill to that depth. This recipe filled eight of mine that are six inches by four inches in the other dimensions but depth is the more important measure. Make sure they’re steam proof and do a ‘dry stack’ test run in a cold steaming pot beforehand. Stagger the edges for full steam exposure all around the dishes and make sure they sit stable and level for the best results.
2 ears fresh sweet corn
250 grams masa harina
25 grams cornmeal
100 grams vegetable shortening (or freshly rendered lard if you prefer)
1 teaspoon freshly ground black peppercorn -or- Tex-Mex spice mix (see note above)
1 teaspoon fine sea salt
1 teaspoon baking powder
corn or vegetable oil for prep
Yield: Eight-ish tamales to be topped with your choice of ‘fillings’ and flavours
Cut the kernels from the ears of corn after shucking and de-silking the ears with a small brush. This should give you about 250 grams of fresh kernels.
In a food processor fitted with a standard blade, process the corn to a coarse consistency, about thirty seconds of pulses, occasionally scraping down the sides of the bowl. Add all remaining ingredients except oil. Pulse several times until fully incorporated. With the processor running, add 250 – 350ml cold water* in a steady stream until a soft and very sticky dough forms. Allow to sit in the machine for ten minutes to fully rehydrate.
* I’ve noticed the amount of water can vary a fair bit so you’ll have to learn this by feel. Vegetable shortening seems to take less than lard, pure masa without fresh corn or cornmeal takes more. The message is, water amounts are a moving target day to day in masa dough making but you’ll soon get the hang of it.
Oil the inside of your chosen ramekins. Fill each with the dough allowing a small space for expansion during steaming.
Steam until the internal temperature rises above 95C (203F) and the dough is set in the centre, anywhere from 30-60 minutes depending on your ramekins. Unmold while hot by running a knife around the edges and inverting onto a plate.
Covering with tamale or taco sauce is nearly mandatory followed by any tamale ‘filling’ of your choice heaped on top. Mexican cheeses, homemade crema, fresh salsa, greens from garden, and/or pickled onions can follow as you see fit.
Author’s note: Experiments with sweet tamale variations on this theme are continuing. A bit of sugar and cinnamon in the mix subsequently topped with fresh berries seems promising.