

I wanted a fast and foolproof loaf for everyday consumption but plain white bread from factory producers just wasn’t doing it for me on the flavour front. A hefty loaf that could toast as well as hold not-so-delicate sandwiches was the mission. I tried to fall in love with wholemeal (aka whole wheat) but to no avail. The taste and texture seems too gruff to make happy bread to my mind. Enter this softer oat-laced contender with fully developed taste and a deliciously dark crust thanks to a touch of molasses.. or honey… or both depending on what’s laying around your pantry when you decide you need some fresh bread. The heft of grains with a touch of sweetness in perfect balance. I’ve found my ideal daily loaf.
“Hands on” time if you can do other chores while the machine kneads and the dough rises is ten minutes at most. I can practically make this one in my sleep nowadays. Added butter gives you another boost of rich flavour and a perfectly soft yet tight internal crumb that will hold any sandwich you care to make between the slices. The oatmeal trick makes for bread with character well beyond insubstantial grocery store “white bread” that will also toast perfectly with butter and marmalade for your morning tea. I dare you to make it just once. You’ll be hooked on the taste and the ease with which you can bake your own ‘everyday’ bread. And at least on my local calculator, it costs me less than a quid a loaf and weighs twice that of factory-made examples. Beat that Megamarket!
(edit: For even easier daily bread, try my ‘pull apart’ buns. I make them just as often as the oat bread.)
Everyday Bread with Oats & Molasses
300ml boiling water
1 teaspoon fine sea salt
2 tablespoons molasses or honey (or a combination)
70g rolled oats (“quick cook” or “old-fashioned” – NOT cut oats)
400g strong flour (aka “high-gluten” or “bread” flour)
2 teaspoons dry yeast (preferably “rapid” or “instant” rise) 1
50 to 100g unsalted butter, melted (adjust to preference, starting with 75g)
Extra flour + vegetable oil for pan prep, kneading, and forming
1 egg plus two tablespoons water, whisked together (optional for a ‘shiny’ loaf)
Yield: One 9″ x 5″ loaf with satisfying heft
Stir the salt and molasses or honey into boiling water making sure to dissolve the salt completely. Pour over oats and allow to soak for at least ten minutes and until the temperature of the mix drops to around 49C(120F). For the benefit of the yeast, you don’t want it too hot.
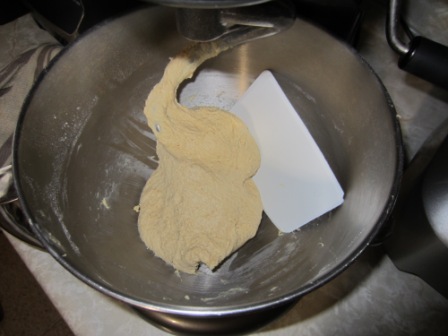
In the bowl of an upright mixer, whisk together flour and yeast. Add oat mixture and melted butter. Stir by hand thirty seconds until the mixture begins to come together and starts to clear the side of the bowl. Switch to the machine fitted with a dough hook and knead on low speed until the dough ball forms, roughly two minutes.2 Allow to sit undisturbed for ten minutes to fully absorb the water (called the “autolyse” step).
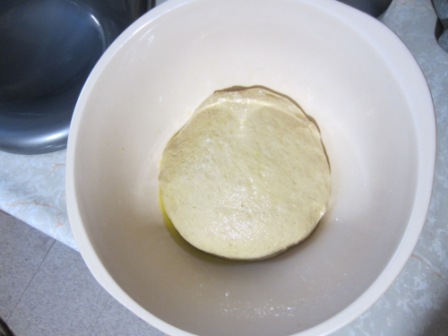
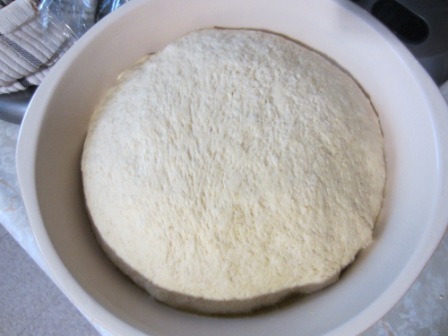
After the rest continue to knead on medium speed for 8-10 minutes to fully develop the gluten structure, scraping the bowl sides and bottom occasionally. The dough should clear the sides of the mixing bowl of any stray flour during this processing. Using a wide plastic scraper, remove the soft dough to a lightly-oiled board and knead by hand briefly to form a tight ball. Place in a large oiled bowl and cover3 in an undisturbed, slightly warm place for roughly an hour to double in size.
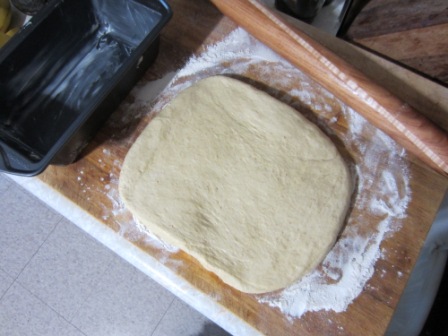
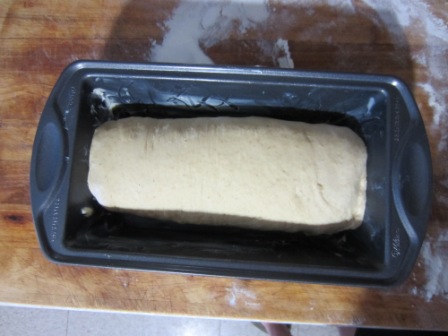
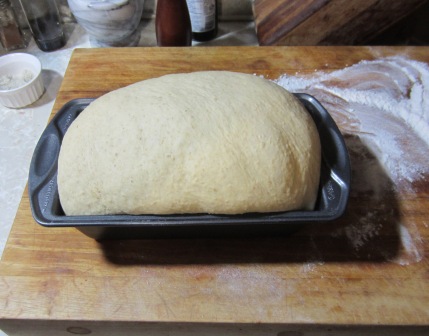
On a lightly oiled board, gently roll out the dough into a square as wide as will comfortably fit your baking tin. A 9-inch by 5-inch pan is recommended but slightly different sizes will work fine if that’s what you have available. Utilizing a bench scraper, roll the square tightly into a ‘log’ and pinch the seam closed securely. Place seam side down in an oiled loaf pan. Cover with enough clearance for the rise to “pillow up” above the pan rim unimpeded to give the traditional sandwich loaf shape.
FULLY preheat your oven to 190C (375F) and use a baking stone if available. For a ‘shiny’ loaf, brush the thinned egg wash over the loaf just before baking (optional). Use a mister or toss a small amount of water on the hot oven floor (not your stone!) to create steam (close the door quick!) and bake for twenty minutes. Rotate the pan front to back and continue to bake until an internal temperature of 94C (201F) is reached on an instant read thermometer, anywhere from 8-12 minutes longer.4 Be careful to check the temp regularly towards the end of baking but don’t be afraid of the darkening crust – that’s a sign of flavour pale grocery loaves won’t give you. I’ve found that this loaf is pretty picky in the last four minutes of baking. It can go from perfect to a bit TOO dark depending on your preference in a hurry so be careful and pay attention towards the end.
As hard as it is to resist the smell, allow to cool completely on a wire rack out of the pan before slicing. It’s actually still baking a bit internally so don’t cut into it until it’s cool to the touch. With enough butter and honey on hand, you’ll only have half a loaf left before you know it.


1 Fresh brewer’s or baker’s yeast can be used if available with interesting flavour results but rising times may vary considerably depending on the ‘liveliness’ of your yeast.
2 As with most bread baking, there’s room for a daily variance in water and/or flour. If the dough is not quite coming together into a ball, add spoonfuls of either ONE AT A TIME until it does. We’re talking one, maybe two spoons here and be patient. Let the machine do the work.
3 Common plastic storage bins come in a wide range of shapes and sizes for very little money and can be found to fit OVER your bowls, sheet pans, and loaf tins perfectly with just the right amount of clearance. I find them indispensable when baking bread and they have completely replaced the use of cling film for rising dough in my kitchen. Avoid using plastic film (or even traditional floured cloths, etc.) that contact the surface of the dough in the final rise because when you remove them, you almost always wreck the texture of your beautifully risen loaf.
4 Not 93C, not 90C… 94C at least. Sometimes a degree or two more. This is a dense bread and you should take the temperature at the CENTRE of the loaf. It sounds like an insignificant detail but that extra degree or two means the difference between fully cooked bread and half raw dough in the middle. The crust might darken more than you’re used to seeing in pale grocery loaves but let it cook all the way. If you want a lighter coloured crust, put some aluminum foil over the top when you turn the pan halfway through the bake.
v5.3