
The first hints of fall are showing up early in the mornings. A little gust of cool air here, the occasional drop of leaves there. Apples are growing fat and sweet. Deer wander past holding ‘to let’ brochures looking for winter apartments in the forest. All it all it’s been a mild summer here but there’s no better feeling to my mind than when autumn calls to confirm it’s on its way. Apart from all the other garden tending that needs to be done as the year plods on towards a snowy ending, it’s time to spare a thought or two for the future in the form of bulbs. For me that means two major categories of my own creation, garlic and everything pretty. I’ll tackle flavour first and save the dahlias and snowdrops for later.
Garlic could be perhaps the easiest thing to grow in cool climates so long as you get a proper variety and think a year ahead. There’s almost nothing that needs to be done for six months after they go in the ground but in the ground they must go in the next six weeks as an over winter crop. The ‘soft-neck’ varieties are the choice of big commercial producers because of slightly larger yields and simpler handling requirements. That’s what you’ll find most often in supermarkets and bulk bins from China. If you want a wider variety of flavour and more garden durability in longer winters, you should aim for ‘hard-neck’ sorts. The names refer to the part of the plant just as it exits the bulb and whether or not the plant has a tendency to bend or flex at that point naturally, both during the growing season and after harvest. There are some breeds that fall in the middle ground between the two but for the home gardener not processing thousands of kilos of the stuff, those habits are really immaterial. Select your plants for flavour, colour, and climate.
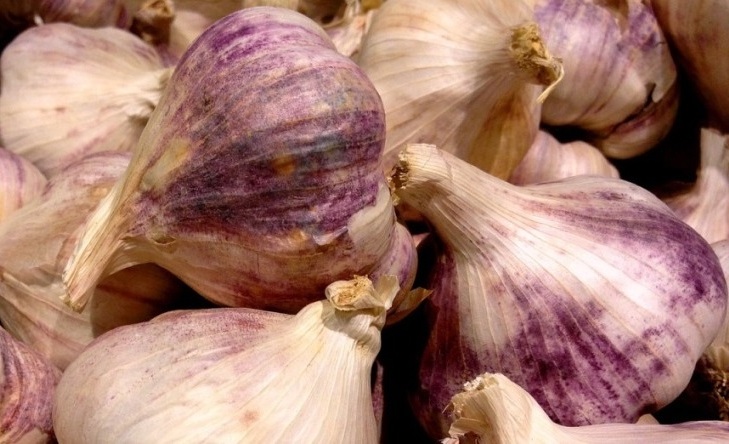
A particular favourite I’ve been growing here in my soggy conditions is called “Red Russian“, a hard-neck version that tastes as good as it looks. I started growing it almost six years ago and even had an off year without proper dirt space during which I managed to force a small seed crop in pots just to keep my strain alive. I’ve also managed to keep some large purple Italian sorts going as well as one of the ‘porcelain’ breeds and while they produce slightly larger bulbs than my favourite Russian winner, the latter makes up for it with consistency of production and intensity of flavour. I also tried my hand at ‘elephant’ garlic once and didn’t really have great luck but that was in a much more dry climate which I suspect was the problem. It might be a good year to give them another go now that I’m in a wetter district because garlic in general does love deep moist soil as long as it’s loose and well draining. Particularly dense soil in your garlic bed could stand some sand or fine grit added at the same time you heap in some of your best compost. Don’t forget to rotate your beds for nutrient-hungry garlic year to year, giving them a tilled-in cover crop or extra amendments to recover after production years.
There are countless seed companies each listing their own handful of selections but since garlic bulbs ship only for a very limited time each year (right now) and preferably for shorter distances, I suggest you search locally or online for whomever can supply you the quickest and nearest at the moment. Some of my favourites are West Coast Seed (Canada), Territorial Seed (US), & The Garlic Farm (UK). Over my gardening life I’ve personally ordered from each of those firms and had good product from them all. Seed crops like garlic and potatoes really test the quality and efficiency of garden suppliers so do shop around to find someone you can trust to get your start with garlic. After that of course just remember to select your strongest plants as seed each harvest year to keep the cycle going.
Planting a small orderly patch couldn’t be simpler as long as you can tell the ‘up’ end of a clove of garlic. When you look at a whole head of garlic you can see the roots on the bottom easily enough and similarly when you break open that head into individual cloves you will notice the attachment point at the root end on each clove. Consider that the ‘bottom’ because upside down garlic won’t grow very well if at all. Those cloves are your ‘seeds’ so to speak and they should be put into rich, loose soil anywhere from four to six inches apart in a trench dug to a depth for your climate. Three inches deep if you live in Texas or similar but deeper by a few more inches as your zone decreases. Here in Eastern Canada where we get hefty snow all winter I go as deep as eight inches for overwinter plantings but again, the soil must be loose and generously enriched to keep it light and friable. Avoid compacting the soil after planting and by all means keep your boots to the path, not the garlic rows. The bulbs need the freedom to expand and it makes weeding early on in the season that much easier. On the other side of the coin, don’t be afraid to heap up a bit of soil over the trench if bulbs begin to peek out prematurely. That’s a clue to go a bit deeper with your trench next year. Because we can have extended snow pack here, I like to put a layer of long-straw hay or pine needles over my garlic bed as a mulch just before the first snowfall and I’m careful to replace it with fresh material as soon as possible in spring and before the bulbs emerge to stave off any black mould that might creep into the stack.
This is important. I can tell you from many a failed experience with lost garlic rows. Make sure you mark your plantings well. That is to say that you have flags or stakes or string lines (or all three) showing you exactly where your garlic sleeps. Things shift about in winter and every other damn thing in your dirt will try to sprout at the same time as your garlic come springtime. The easier it is to identify in six months time the better. Weeding is probably the biggest task until the garlic can really get going and crowd out competitors on its own. You’ll also want to quickly trim any flowers that form – some varieties do, some don’t – so that the energy is kept focused on fattening up the bulbs. Use the flowers as an early edible treat.
Not sure you want on the garlic bandwagon quite yet? I’ll give you a quick challenge. That ordinary grocery store soft-neck garlic you bought a month ago for pasta night? If one of the cloves has a little green shoot forming on top – which proves the garlic is viable and hasn’t been treated to inhibit growth – take any other *un-sprouted* cloves from that same head and go outside. Shove them root end down in a loose patch of dirt by making a small trench as wide and deep as three fingers spread with each clove spaced about the same distance, fill back in with more loose soil (don’t press in much if any), and then cover the patch with shredded leaves or pine needles from the yard. Stick a flag or rock to mark the row so you remember where it is and forget about it until May. They’ll grow just as well as the seed garlic you’d buy from the garden centre underneath the winter blanket of snow without so much as a single thought from you. Just remember when April rolls around to go clear off the mulch and do a bit of weeding around your sprouted garlic offspring. Congratulations, you’re a garlic farmer.
Harvesting is done when the plant gives you some clues. The tops begin to die back on their own very late in summer and in their last few weeks I stop watering them to set the bulbs. After a careful test draw to ensure the whole lot is ready, I use an all over deep dig with my trusty garden fork to seriously loosen the whole patch safely away from the bulb rows. I then go in with a small hand fork to lift the intact bulbs one by one from below with only a gentle tug on the remaining foliage from above so it stays attached for later storage.
I’ve never really gotten good at the braiding of the bulbs so I just twine them together in loose bunches that last throughout the winter when dried and hung like you would onions. Of course the frugal beauty of garlic is that if you plant a surplus, you’ve got your starts for the following year. I pull mine out of the ground for harvest in late September most years and assign perhaps ten percent of the most vigorous specimens to be dug right back into the ground a few weeks later. You can plant right up until the end of October in most climates so there’s no huge rush and plenty of time to order in starts if you’re just beginning your garlic growing adventure but don’t drag your feet because lots of the interesting varieties tend to sell out. I suggest getting several sorts your first year, both soft- and hard-neck, just to test in your particular conditions. All garlic can be picky about soil particulars and despite reading voraciously on the topic and juggling pH test kits about, there’s no substitute for a year in your own dirt. It will be really obvious which species love or hate your specific soil recipe.
The good news is that garlic is a very dense crop. One small plot can produce all you need in the kitchen for the entire year, especially once you find the winners for your patch. It’s worth four feet square just to give it a go. After all, what else is that dirt going to do with itself all winter, eh?