
Quick breads are really just overgrown muffins but they’re so much more convenient to make you can’t help but whip one together around teatime to satisfy a craving. The clue is right there in the name – they’re “quick”. The trick is keeping them light in texture and getting them to cook through properly. After that the sky’s the limit on flavour combinations. Any berry of opportunity can make you a grand version as can the simplicity of lemon. A boozy orange sort around holidays is also a fine interpretation. Come to think of it, I’m one of the few on the planet that likes a fruit cake when done properly. Of course in many corners of the planet there’s one quick bread that reigns supreme – banana bread.
There was a quick bread from my youth that I can remember Mum making regularly, a nut bread with her spin being a bit of pineapple tossed into the mix. Years later I found out the recipe started with a boxed version of a ‘date nut bread’ simply because it was cheaper than buying the walnuts alone. I was eight – what did I know about quality, eh? It turns out that Pillsbury stopped making that version decades ago and the flavour was never the same again although I readily admit that might be a good thing. Still, the notion of this bread has lingered for ages and I’m finally getting around to making a replica, hopefully better than I remember.
My straight up banana bread recipe is already pretty good. It uses a few ingredient tricks like fresh lemon juice and sour cream for character. My carrot cake is similarly divine and is made in, of all things, the food processor. There I omit the butter and use the machine to emulsify oil with egg to give an otherwise dense cake serious lift. If anyone wants that recipe, let me know and I’ll work on typing it up.
This beach-inspired quick bread research project has elements of both. Bananas and pineapples can get too dense in a hurry so I’m going to incorporate the previously proven food processor technique. To give some zing to the bananas which have a tendency to become mundane, I’ll work in some yogurt and acid by way of the pineapple. That seems fair in keeping with the whole tropical theme, doesn’t it? One of the keys to making the whole thing come together is to get much of the moisture out of the core ingredients before it heads to the oven. Too much liquid turns this from a delightfully moist bread into a gelatinous brick.
To further ensure against baking failure, this is a fairly small batch that doesn’t attempt to create a particularly tall loaf. That’s a challenge with dense ingredients and usually leads to overcooked edges and raw centres. I call for a 9″ x 5″ pan here but in reality, I somehow managed to acquire a non-standard size pan about a quarter inch wider. The idea no matter what shape pan haunts your cupboard is to only fill it about two-thirds of the way full. If you have extra batter, toss it in a muffin cup or two to bake off in half the time as a cook’s treat.
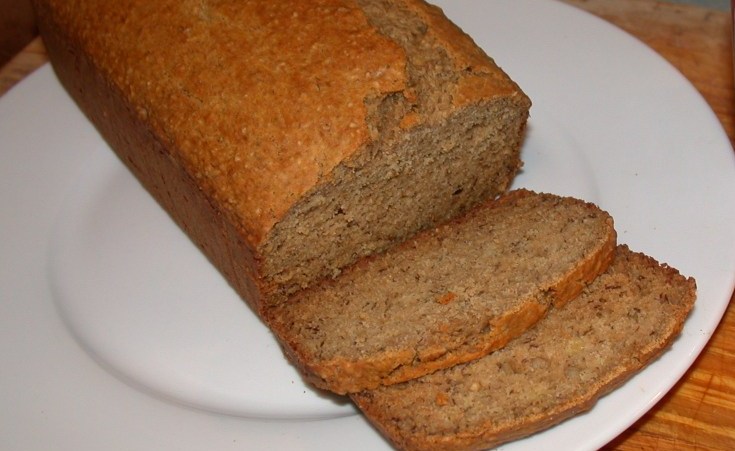
Banana Nut & Pineapple Quick Bread
3 ripe bananas, (prepared yield ~ 250g, see method below)
1 – 398ml (14 oz.) tin pineapple ‘tidbits’, drained (or substitute 7 oz. fresh pineapple chunks)
75g (3/4c) chopped walnuts
210g (1 2/3 c) all-purpose flour
1 teaspoon fine sea salt
1 teaspoon baking soda
1 teaspoon baking powder
2 large eggs from happy chickens
120 ml (1/2 c) vegetable oil
50g (1/4 c) unsalted butter, melted
80 ml (1/3 c) plain whole fat yogurt
125g (3/4 c) light or dark brown sugar
Yield: One 9″ x 5″ loaf… short though it may be
v.1.3
Extra ripe bananas can be stored in the freezer up to twenty days ahead (and at least overnight) so they give off much of their internal moisture when thawed. When ready to bake, peel and place in a strainer over a bowl to catch any liquid * as they defrost, about an hour at room temperature or hurry them along with short fifteen-second bursts in the microwave. The resulting banana mush is exceptionally ugly but don’t let that put you off your baking mission. Spots and discolouration are perfectly normal and mean you had properly ripe (and sweet) bananas.
*If you’re a fan of potent banana flavour (I’m go both ways depending on mood), reduce any liquid collected down to a concentrated syrup over medium heat and add it back to the recipe. This is usually starts around 2/3 cup in my experience and I’d want that cooked down to less than a few tablespoons so as not to add more liquid than necessary to the recipe.
In a food processor equipped with a standard cutting blade, add the drained pineapple pieces and process in short pulses until they are about a quarter-inch in size. Getting this size correct is important because too large and your bread will fall apart, too small and they lose their interesting texture in the finished loaf. Add to the strainer holding the banana to drain for a further few minutes.
Preheat the oven to 190C (375F) and spread the walnuts in a single layer on a baking sheet. Place in the warming oven to toast just until fragrant, anywhere from five to fifteen minutes depending on the speed of your oven, shaking the pan every few minutes. Remove and set aside to cool.
Sift the flour, salt, baking soda, baking powder together and set aside. Oil and flour a 9″ x 5″ loaf pan or if you prefer, make a parchment paper sling for easier removal later. Avoid using butter as it tends to burn in these longer baking times.
In the same food processor bowl used earlier, add the eggs, oil, & butter and process to emulsify until smooth and light in colour, about a minute. Add the yogurt and sugar and process a further thirty seconds. Remove to a mixing bowl and add the banana and pineapple, whisking to combine well while mashing the bananas further in the process. A few remaining lumps is fine.
Pour the banana mixture into the prepared dry ingredients along with the cooled walnuts. Fold to just barely combine being careful not to over mix at this point. Pour into the prepared pan and bake thirty minutes. Reduce the oven to 175C (350F) and rotate the pan front to back and bake until a wooden skewer inserted *in the centre* can be removed cleanly, about twenty minutes longer. Note that the edges of the loaf will bake quicker so be careful to use the middle as your guide.
Allow to cool in the pan for ten minutes then remove to a wire rack to cool almost completely before slicing and making a great cup of tea to match.