

Technique is everything in baking. An abundance of cheap bananas had me making my stock standard banana bread a few different ways this week in an attempt to get the lightest version possible. Not an easy task sometimes thanks to a few factors in the classic recipe. Bananas lift about as well as a lumpy cardboard box full of gravity.
Because there are so many variations out there on this theme, I’m not going to try to convince you that mine is the best. It is however quick and delicious thanks to some tart additions by way of sour cream and lemon juice. My pineapple-and-nut-laced version is a bit more complicated but for this rudimentary example all you need to remember is to toss your elderly bananas into the freezer at the end of their life so you’ve got that part of the liquid-removal equation covered when teatime rolls around. Getting most of that liquid out is key to avoiding a gelatinous lump in the end results. First thought to first warm bite can be less than an hour if you’ve got bananas ready to defrost. They’ll wait patiently for your bread urges in the freezer for weeks. Even longer if you pop them into plastic bags or vacuum seal them to prevent freezer-induced desiccation.
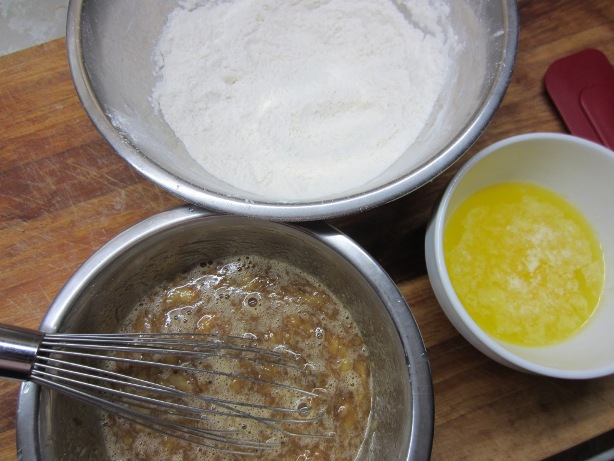
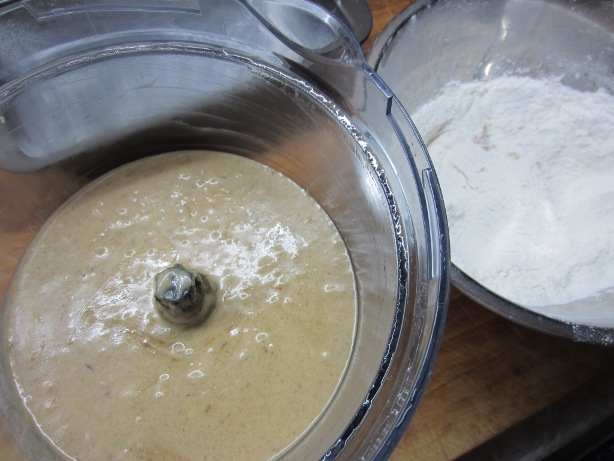
You can absolutely make this quick bread by hand with a sturdy whisk as I’ve done countless times. But here is where this week’s rapid-fire tests have shown that machinery really can help with lift. Peek at the images below and you’ll see the hand-whisked version versus the food processor-pulsed version of the ‘wet’ bowl. See how much lighter in colour the latter is? Smoother too. What happens with thirty seconds of whirr is that air is better incorporated into the eggs and the butter emulsifies everything more efficiently. That translates into lift you usually don’t get from a hand whisk even if you have a team of French culinary interns at your disposal. Take the extra minute and use the processor I say.
All other standard quick bread rules apply. Don’t over-mix the final batter, don’t bake it too long into a dry heap, use a scale to nail down a recipe that fits your pan perfectly, etc. etc.
Mr. Spork’s Stock Standard Banana Bread
“Wet” Bowl
4-5 overly ripe medium-sized bananas, frozen at least 24 hours
150 grams brown sugar (light or dark to preference)
2 large eggs from happy chickens
4 tablespoons sour cream or plain yogurt
1 lemon worth of juice (zest optional)
120 grams unsalted butter, melted and cooled (or substitute vegetable oil in a pinch with less flavourful results)
“Dry” Bowl
250 grams all-purpose flour
1 teaspoon baking soda
1 1/2 teaspoons baking powder
1 teaspoon fine sea salt
1/4 teaspoon freshly grated nutmeg
1/2 teaspoon ground cinnamon (optional)
Preheat the oven to 176C (350F). Butter and flour a nine-inch by six-inch loaf pan and set aside. Parchment sling optional if you don’t trust your pan to let go easily.
Run the frozen bananas under hot water from your tap to loosen the skins and start the defrosting. Peel and place in fine mesh strainer over a bowl to drain as they continue to thaw from frozen. Almost a third of their weight will drain off as liquid. If you’re into pre-planning, you can let this drain happen overnight in the fridge. Final yield should be about 300 grams of incredibly ugly drained banana mush. Reduce the drained liquid by 4/5th of its volume and return to the wet bowl mix.
Process the bananas with the remaining ‘wet’ bowl ingredients until light in colour (see above), about thirty seconds in a food processor equipped with a standard blade.
Sift together all ‘dry’ ingredients in a separate bowl. Add the wet bowl mix to the dry bowl and fold gently from the bottom just until combined. A few streaks of unblended flour are better than over mixing here. Transfer to the prepared loaf pan and fill no more than two-thirds full unless you want a dense brick. All the leveners in the world can’t lift a completely full pan of banana. Any small surplus is best baked separately in a small ramekin as a cook’s treat in about half the time.
Bake for twenty minutes then rotate the pan front to back in the oven for even cooking. Be gentle with this turn to preserve your hard-earned lift. Bake a further 15-25 minutes until a knife inserted in the CENTRE can just barely be removed cleanly, checking carefully towards the end to avoid over-baking. The top will still show some moist cracks but DO NOT over bake this loaf until it appears completely dry. It will continue to bake inside for several minutes after you take it from the oven. Allow to cool in the pan for ten minutes before turning out onto a wire rack to finish cooling completely.
Can be served warm, hopefully with extra butter, but wrap the loaf tightly in cling film once completely cool to preserve the moist character for teatime over the next few days.
-v.11.2