
In the heat of summer the last thing most anyone wants to do is crank the kitchen oven into overdrive. That means you have to head outdoors with any creative food urges that aren’t centred on ice cream production. You can cook nearly any recipe normally made indoors on the wide range of outdoor hot boxes. Grills, barbecues, smokers, wood-fired ovens, and my favourite, the kamado.
If you’ve not seen them they’re a very old idea that’s been updated for the masses. Traditionally made out of thick insulating ceramic or clay – which is very heavy, expensive, and hard to transport without cracking – there are now lighter weight versions made of steel like the one I own that are double walled with modern insulation in between. I’ve had great luck with mine for the full range of grilling and smoking but with the simple addition of a few locally-sourced kiln stones as heat sinks and baking decks, I can get pizza and bread from it that outshines anything you can accomplish indoors at a measly 260C (500F). And since it holds heat so well I can toss in some ‘ordinary’ baking after I’ve shut down airflow to the coals to kill the fire. The resulting slow temperature decline after the main event cooking can keep me baking for several hours all without a single BTU heating up my indoor kitchen. Trust me when I tell you that blueberry cobbler is pretty good with a faint hint of smoke.
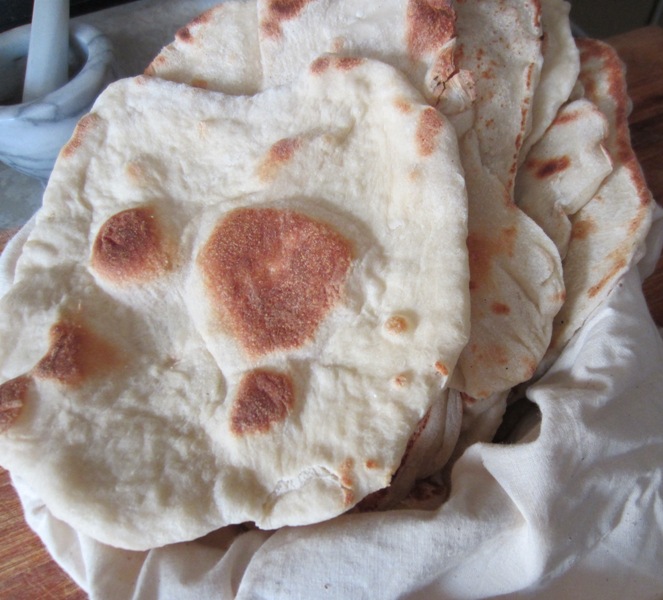
One universal bread whose freshness and taste can’t be duplicated in store-bought versions is pita. I’ve written about making your own at home before in another corner of the web but a recent article in Felicity Cloake’s “How To Make The Perfect…” series reminded me how delicious and easy they are to produce in your own kitchen. Fifty cents will get you a dozen fresh rounds that you couldn’t buy in the store at any price, unless you happen to live around the corner from a Lebanese bakery.
My recipe ingredients are nearly identical to hers but our methodology differs in one huge respect. I say you simply must make these in an outdoor oven. Not only can it achieve drastically higher temperatures compared to an indoor appliance, the charcoal* will impart the hint of flavour that makes this simplistic bread into something worthy of the best souk. In a batch made over the weekend my kamado reached around 425C (800F) which cooks the breads almost as fast as you can flip them. It also has a great charring effect like you’d see in, say, naan made in a tandoor. Something Felicity aims to duplicate in her research with other pan trickery but something my outdoor heat fest does without effort. My dough ends up a bit ‘wetter’ to account for higher baking temperatures but doesn’t need to use different flours for taste. The fire does that flavour work for me.
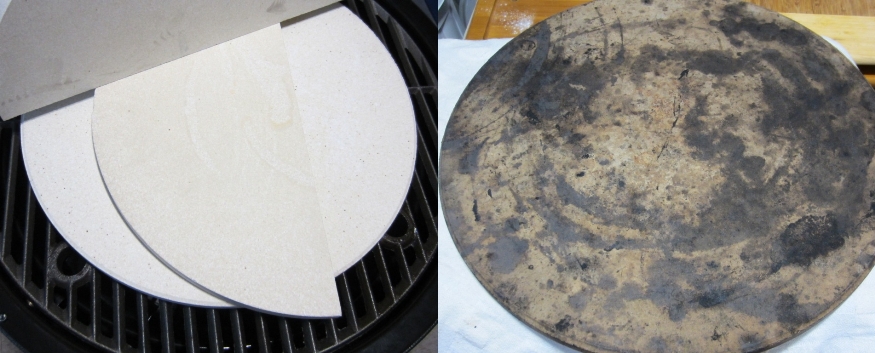
The fact is that you can also bake these on any ordinary grill or barbecue if you use a kiln stone. You might go through more charcoal* in the process but since they cook so fast you don’t need to maintain that high temperature for very long. Kiln stones are a much better choice compared to thinner ‘baking stones’ and other retail nonsense sold at inflated prices. You can get them at your local pottery supply house for a fraction of the cost and they’ll be thicker and more durable than flimsy imitations. They’re produced in rounds, squares, and rectangles as needed but be careful that you purchase a solid stone. Some are made with hollow cores to help the backs of overworked potters but here you need the solid thickness to hold onto that glorious heat better. Measure your grill surface but leave at least some space for heat to come over and around to the top side of your improvised oven, i.e. don’t cover every last inch of your grill space. In my case I have both full rounds for baking and half rounds to use as heat shields during indirect cooking. While you’re at the pottery store, explore some shape and size options. They’re cheap.
* I said charcoal, not propane. If you’re not going to use charcoal or wood as fuel, you might as well make these inside in an electric oven, you slacker. Seriously.
There are some other tricks to using kiln stones but I’ll cover them in another post. Just go buy the thickest solid-core version you can manage to lug home and make some pita already. A spot of hummus while you’re at it wouldn’t be a bad idea either.
Pita Done Outdoors
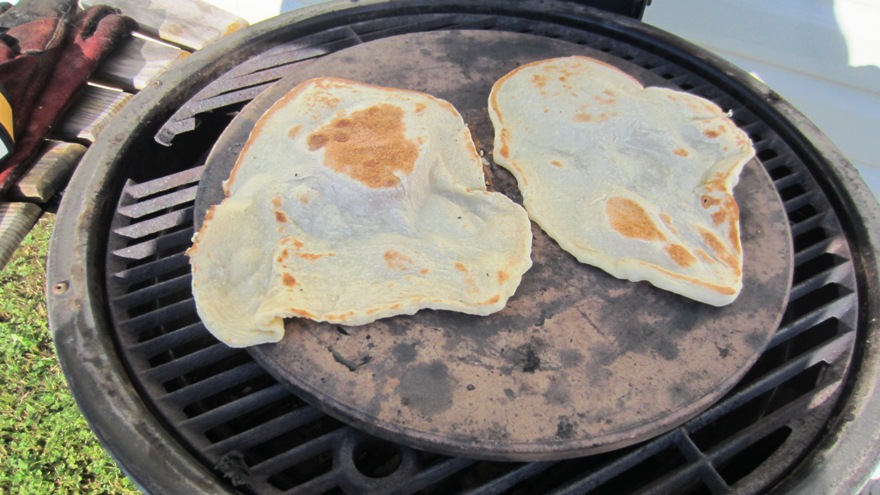
You want to attain a temperature of at least 315C (600F), up to a maximum of about 480C (900F). This will char, bake, and inflate your pitas quickly so don’t look away but do trouble to close the lid even for the few seconds in between flips to achieve better results. An infrared thermometer that can measure from a distance is useful here, as are welder’s gloves and long handled tongs to keep you safely away from that raging heat.
500 grams bread flour (aka “strong” flour) with at least 11% protein + extra for rolling
1 teaspoon fine sea salt
320ml warm (not hot) water + up to 100ml more on any given day
2 teaspoons rapid rise yeast
2 teaspoons sugar
2 tablespoons olive oil + extra for forming
2-4 damp tea towels
Yield: one dozen pitas
Whisk together the flour and salt in the bowl of an upright mixer fitted with a dough hook. Into 320ml of warm water add the yeast and sugar. Whisk well and set aside until foam forms on the top, about ten minutes.
Add the yeast mix and oil to the flour and stir with a sturdy spatula twenty stokes. If there is any ‘loose’ flour remaining or if the dough is very stiff, add additional warm water and stir just until all the flour is well hydrated. Move to the machine and knead on medium-low speed for eight minutes. It should be fairly sticky so use a flexible pastry scraper for handling. Gather into a single dough ball and place in an oiled bowl rolling to coat all sides. Cover in a warm undisturbed place to rise until doubled in size, anywhere from one to two hours depending on temperature.
Just before rolling out the dough, begin to preheat a baking stone over a charcoal or wood fire in a kamado, grill, or similar outdoor oven that is enclosed or otherwise equipped with a lid*. Please don’t make pita breads on propane or other gas-fuelled grills. They will (at best) be bland and (at worst) smell like a petrol station. In other words, they will suck.
* If I can improvise an oven in the forest with a circle of rocks, a baking stone, and a wok lid, you too can sort something out that will work.
Remove the dough to a lightly oiled surface and make twelve equal portions (roughly 75 grams each). Roll and pinch into tight balls and place under a damp tea towel. Let rest fifteen minutes.
Now working on a lightly floured surface with a sturdy pin, roll each dough ball into a round (or other mutant shape) so that they are an even thickness and anywhere from six to eight inches across depending on the desired end texture – thicker for more pliable examples, thinner for slightly crisp versions. After rolling let each set in place for about a minute on your work surface to avoid ‘stretch back’ and then move to rest between layers of damp tea towels for fifteen minutes longer.
When your baking stone hits target temperatures, lay one or two dough rounds on and close the lid for thirty seconds. Flip with long-handled tongs and cook on the second side with the lid closed for about a minute, depending on your temperature. If necessary, flip one or two more times baking in thirty second intervals until fully cooked and spotted brown in several places. Allow the stone to recover heat briefly with the lid closed between batches as needed. After an initial test pita you should be able to adjust timing to bake each with just one flip. The first might be a wreck, the last will be pita genius… with practice.
Depending on your intended use, pull them off while still very pliable (say for falafel or gyros) or slightly more crisp (as with hummus dipping adventures). Eat the same day you make them when possible or store in sealed plastic as soon as they cool to maintain texture for an extra day. Maybe two. After that it’s time to make fattoush (pita salad) or bake them further (brushed with olive oil in a hot indoor oven) to become much more crisp ‘pita chips’ that can keep for nearly a week.