

I keep harping on about how much better my homemade mayonnaise is compared to the ready-made examples in the market so I thought I’d move that whole rant out of the tested recipe substitutions department and onto its very own page. You will be amazed at how much better it tastes, how cheap it is to make, and how fast you can have some in your fridge ready for the next sandwich emergency or batch of Mexican street corn. Plus it’s pretty cool to watch oil turn into mayo right before your very eyes. In sixty seconds or less.
I have to briefly explain the equipment you’ll need. Namely an immersion blender. Or what some people call a ‘stick’ blender or ‘blending wand’. The name is self explanatory but finding a good one takes a bit of know how. Can you do this in a food processor or regular blender? Perhaps, but you’ll lose half your batch cleaning the gear afterwards and likely won’t get as good an emulsion if your other mix-ish type gadgets aren’t up to the task. Plus I’ve discovered that even cheap immersion sticks can do a fine job and they’re insanely useful devices for all manner of other kitchen tasks. You’ll never have lumpy sauces again and whizzing soup to creamy smoothness in the pot while it’s still on the stove top is a joy.
For the most efficient blending and emulsification of things like mayonnaise, you want at least one container that just barely fits the wand without too much extra room so make sure your new Mix-A-Stick 5000 comes with a matching blending cup (most do) or that the business end fits into regular mason jars. Trust me on this. It will make your life loads easier down the line with cleanup and the ability to easily store your creations by just adding a lid when the whirring is done.
When shopping you need only consider the power (150 watts or better) and the blade placement. Anything else is just window dressing. If you really want one that’s colour coordinated with your toaster or has a detachable end, go for it but know that those $49.95 versions aren’t any better than a generic model at a quarter the price if you shop smart.
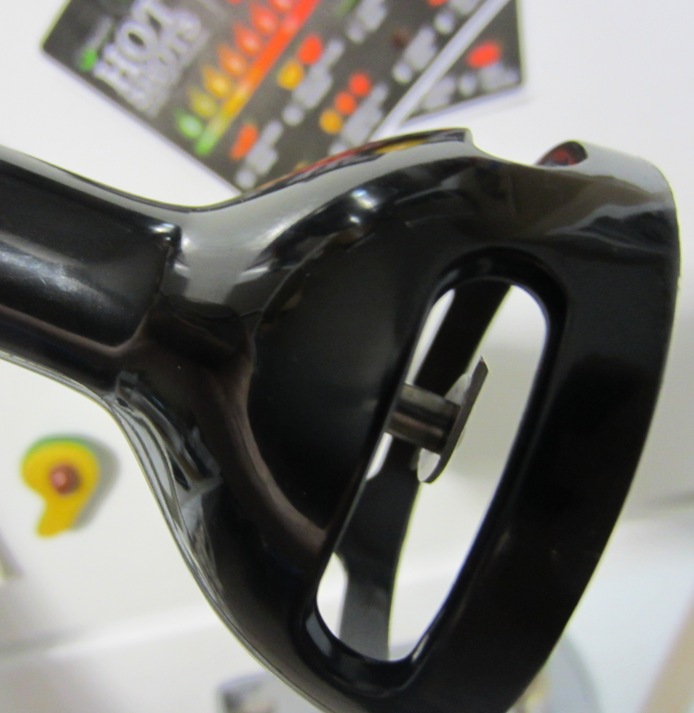
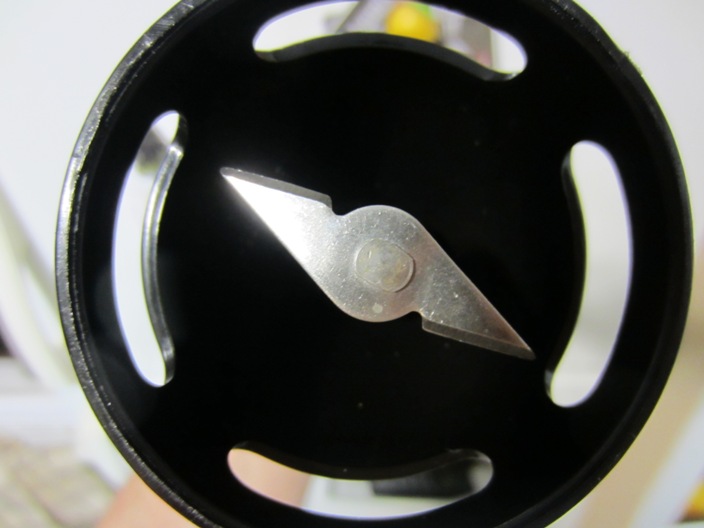

See those slots in the side of the blending tip? They’re ‘escape vents’ for the blended material when it needs to go somewhere before any more can be drawn up into the blades. You want those slots to be generous in size and located AT OR ABOVE the level of the blades when looking at it from the side. If the slots are below the blades, or worse still if there are no slots, put it back on the shelf. This single most important design criteria knows nothing about price or brand, only function, so don’t let any other aspects of your intended purchase distract you.
For reference here in Canada, I use an “Everyday Essentials” from Superstore (the plain green box) that cost $11 and it works better than two others I have in the drawer that were triple the price. Know that these gadgets all burn out in a few years no matter the brand, usually at the worst possible moment, so it might make sense to pick up an extra and shove it in a drawer when you find a bargain. A bit like coffee bean mills that way except I use those as spice grinders and rip through them like eggnog at Christmas.
As for ingredients, the classic version of mayonnaise is simple. But herein lies one of the best things about making your own. You can improvise all over the theme like a drunken New Orleans piano player let loose in the kitchen. You can chuck in chiles or garlic. You can whip in some honey. You can grind in crazy Moroccan spices. A dash of hot sauce? Sure. Hack any old herb out of the garden (tarragon is spectacular) and it will likely taste great in your mayonnaise. And if that wasn’t good enough, many additions will get better with time. I try to keep fresh herb batches small and use them up quickly but if you let newly cracked peppercorns and a dash of balsamic sit in there for a week, you’re in condiment heaven.
Mayonnaise purists will use only egg yolks (I don’t bother and use the white too), perhaps up the lemon juice ante a bit*, and leave out the sugar entirely but if you’re detoxing off grocery jars your taste buds will likely be expecting a bit of sweet. Try this once and you’ll be making enough of the stuff that you can find your happy mayo middle ground with experimentation. If you really want to push your condiment comfort zone, try coriander leaf (cilantro in America) and a small measure of Asian fish sauce for the best Vietnamese bahn-mi sandwich mayo ever.
* Many (many!) recipes cheat the acid measure with some exotic vinegar or other in place of a portion of the lemon juice. Fine by me if you wish but the ratio stays mostly the same. Straight up lemon for me is the classic. And the zest can go in there too for a fun twist. Ha! Get it? “twist of lemon”? Tough crowd.
Basic Mayonnaise Ratio
1 large egg, pre-pasteurized or from happy local chickens and pasteurized at home (see notes below)
Juice of one lemon, about two tablespoons (plus zest if desired)
1 teaspoon Coleman’s dry mustard powder -or- 2 teaspoons prepared Dijon mustard
1/2 teaspoon fine sea salt
up to one teaspoon sugar (optional)
325 ml oil *
Plus any flavour additions you desire. See notes above.
* A neutral oil is best (e.g. canola, rapeseed, sunflower, or soybean) but others can be used as part of the blend. Extra virgin olive oil tastes good but can have stability issues so use it as half the amount at most. Avoid strongly flavoured oils such as corn for the base but try tablespoons of exotics like toasted sesame or almond for an interesting tweak.
In a container that fits the end of an immersion blender, say that empty mayo jar you just found lurking in the back of the fridge, combine all ingredients and blend starting at the bottom. Pull the blending tip up through the oil until completely emulsified into a thick consistency, usually less than a minute. Refrigerate and allow the flavours to combine at least half an hour before first use for the best flavour. Store sealed and refrigerated for up to a month. You’ll probably run out long before then.
On rare occasion the condiment gods don’t smile upon your efforts. Even though I’ve made hundreds of pints of this stuff, I still sometimes get a batch that ‘splits’ into a grainy mess and never emulsifies into the smooth mayo I’m expecting. Fear not, there’s still hope for your ingredients so don’t bin them. Simply start anew in another jar with a fresh egg and acid but instead of new oil, use your failed mayo instead. Sure you end up with more mayo that you intended but it never goes to waste. I suspect failure is usually from too high of an oil-to-egg ratio but I’ve had even precisely measured blends go south on me for no obvious reason. Perhaps just on the variety from egg to egg. Luckily you can almost always re-whirr the whole lot into a nice new creamy result without wasting any of your pantry.
Notes on pasteurizing an egg for safer mayonnaise:
You can easily make a raw egg safe for mayonnaise recipes by using the microwave. Combine the egg and lemon juice with one tablespoon water and mix well using a fork or small whisk. That additional acid will help buffer the egg and raise the temperature at which it would cook to solid.
Place a large cup of *boiling* hot water near your work space and have an instant read probe thermometer sitting in it at the ready. Place your whisking device and probe thermometer into the boiling water for several seconds between uses to sterilize and prevent any potential cross contamination.
Working as quickly as possible, microwave the egg mixture on high for ten to fifteen seconds and remove. Whisk again to prevent the egg on the outer edges of the container from cooking to solid. Take the temperature of the egg mix and then return to the microwave for another ten to fifteen second burst. Continue this cycle in shorter and shorter bursts, whisking between each, until the egg mixture just reaches 72C (161F) at which level harmful bacteria will be killed, usually a total of about forty-five seconds depending on the power of your microwave. Avoid going over this temperature as much as possible or the egg will cook and lose most of its thickening power. If that happens, make an omelette for lunch and start over with a fresh egg.