
Sometimes you just need a sandwich. For me it’s usually in the middle of the night during hot summer months and yesterday was a prime example. I had all the pieces of the puzzle just waiting in the fridge – my horseradish coleslaw, homemade mayo, habanero pepper jelly, and the choice bit of meat that makes its way into my kitchen in the form of lovely ham brought in from the smokehouses of Quebec. I don’t indulge often but a whole smoked shank from my French-speaking countrymen is a few kilos of goodness. They come whole and need only some finishing time on a low BBQ to reheat or the cheats method of boiling them in a vat laced with spices until the meat falls off the bone.
The only missing component was proper bread to contain it all and I’ve gotten that down to a science. Sandwich buns, the soft round sort used for hamburgers, shredded BBQ, breakfast egg and cheese, or a gadzillion other permutations suffer just as much at the hands of commercial bakeries as do more traditional loaves. I’m sure industrial recipes change slightly for texture but are otherwise the same pale, uninteresting products of different shapes you see languishing in plastic bags on market shelves. Even the baking challenged can do much better at home in minutes with just a bit of practice. As an added bonus you’ll pay around fifty cents for an eight-pack instead of the usual $3 retail if you’re getting a fair deal on flour and yeast. Why build a great burger atop a boring bun?
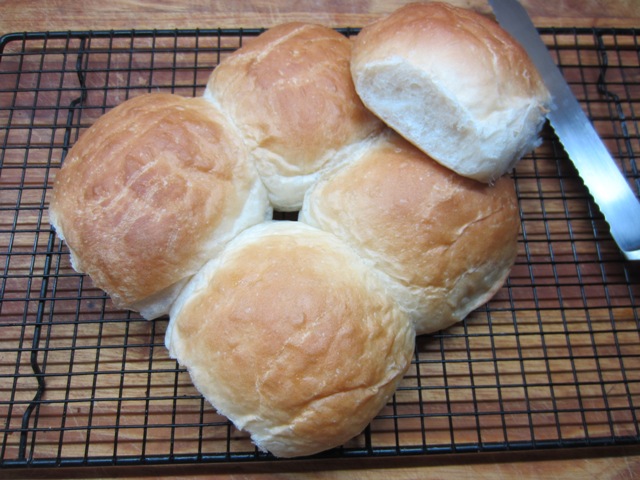
This is a bit of a cheat for me since the recipe is nearly identical to my pull-apart rolls made in a cast iron skillet. Those are slightly more dense and rise higher than what you’d likely want for a proper hamburger or brisket sandwich. The main change is the rising technique, or to be more specific, the rising space. By freeing them from the confines of the smaller cast iron pan, they spread further and rise a bit lower giving a shape and size that’s sandwich friendly. It’s the oil in the recipe that keeps them soft and so long as you bake them straight after rising, you don’t need any of the stabilizers used by the factories to keep them light as pillows.
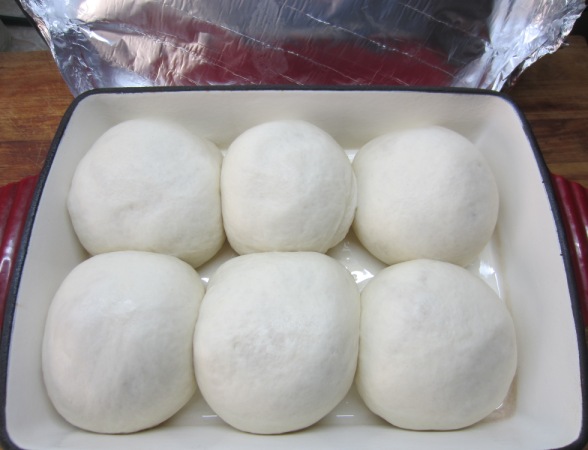
As you can see I trade the 10-inch cast iron skillet for a 9 x 13-inch baking tray which nestles half a dozen rolls perfectly for shape and size. One of my best cookware finds over the years has been the cast iron version you see above not least for its dashing red colour. As with all cast iron, the pan holds heat which makes for better baking but if all you have is a commonly-found glass version – about $4 at any megamart or discount store – don’t worry. That will work perfectly well with only a slight variance in the total baking time. Clever readers will notice that it only fits six buns for a recipe of eight and while I was going to scale the recipe to fit, I soon realized that whenever I’m in a sandwich mood I always find myself wanting the extra pair. Since you need to bake the whole batch straight away after rising, the simple solution is to park the extra two in a spare 9 x 4″ loaf pan. They come out a bit more square but still just as delicious. Someday I’ll find two 9-inch square cast iron pans and dedicate them to the task.
Better Sandwich Buns At Home
350 grams all-purpose flour + extra for forming
1/2 teaspoon fine sea salt
1 teaspoon rapid rise dry yeast
1 teaspoon sugar
200 ml warm water @ 41C (105F)
3 tablespoons vegetable oil
2 tablespoons unsalted butter, melted (optional, for topping)
Yield: Eight sandwich buns you could use as pillows for less than 7¢ (5p) each
Weigh the flour into the bowl of an upright mixer fitted with a dough hook and add the salt. In a separate bowl whisk the yeast and sugar into the water. Allow to sit five minutes to bloom on cold mornings otherwise proceed to add to the flour with the oil and stir by hand just to combine. Allow to sit undisturbed for five to ten minutes for the water to absorb (autolyse) then machine or hand knead until a moderately sticky and elastic dough forms, about seven minutes on medium machine speed or ten minutes by hand. Place in a lightly oiled bowl for a first proof of thirty minutes, much shorter than most.
Punch down then divide into eight equal portions roughly 90 grams each using just enough bench flour to make the dough workable without sticking. Roll under a cupped hand to form tightened dough balls and place in well-greased or parchment-lined baking dishes (see notes above) evenly spaced to allow for rise. Loosely cover in a warm undisturbed location for one hour. Preheat the oven to 190C (375F) midway through the rise.
Very gently brush with melted butter if desired and bake until golden brown and an internal temperature of 100C (210F), anywhere from 20-26 minutes depending on your equipment. Remove to a cooling rack for at least thirty minutes before tearing into them. For softer texture over the next few days, move to a large sealed plastic bag when they are still very (very) slightly warm.